Delivering Precision.
You cannot inspect the variation out.
You can only build the precision in.
It is never really possible to inspect your way to precision. Anyone in the extrusion industry can probably recall inspectors with GO and NO GO pin gages checking inside diameters of tubing lots, pulling the bad parts “too large”, “too small”, and keeping the good. Quality level was defined by the percentage of parts that were inspected. 100% inspection meant that each end was checked with pin gages for compliance to the specification.
It was a fool’s game. 100% compliance with the pin gage check did not mean that the dimensions were controlled. It only meant that the ends of the tubes were determined to be within specification. In fact, the only difference between the good parts and the bad parts was the random position of the cut along the length. The good pieces weren’t any worse than the bad pieces that were scrapped. The dimensional variation piece to piece was roughly the same.
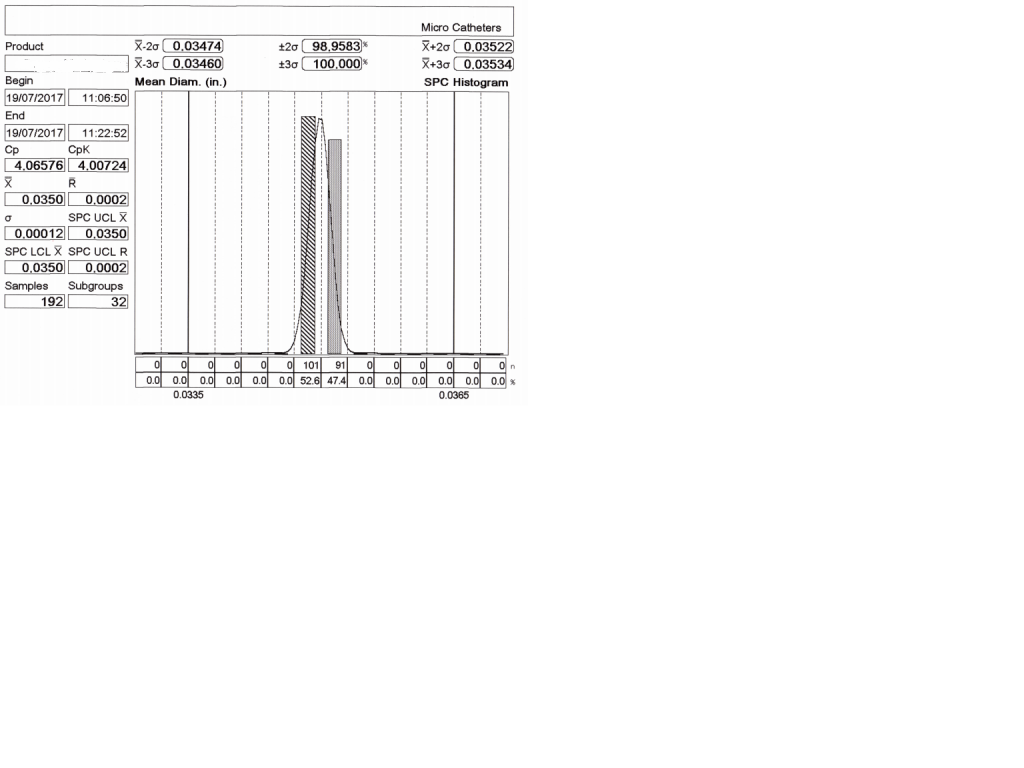
The only way to deliver precision is to have a process capable of delivering precision. That’s why we are invested in the world’s most precise extrusion equipment. It is the reason why we monitor everything we produce with in-line laser measurement. You can see from this histogram that it’s working. By controlling the outside diameter and the walls, we effectively control the inside diameter. We still use pin gages. But not much. Just for quick checks at set up. Then we conduct precise measurements of wall thickness, concentricity and inside diameter using high powered microscopy. We understand that we can’t deliver precision by inspecting variation out. We can only deliver precision by building it in. That’s our recipe. And that’s our promise.


